Processing drop shipments in Microsoft Dynamics 365 Business Central
I recently had to teach myself how to process drop shipments in Microsoft Dynamics 365 Business Central. I was familiar with how the process worked in Dynamics GP and to my surprise there is a few big differences, hence the reason for this blog.


In conclusion Business Central is quite different in the way drop shipments are processed through the system than Dynamics GP. I wish you could post the vendor invoice prior to having to invoice the customer but if that's the only issue I have with the process then I'll survive. Happy drop shipping!

Scenario
Your customer places an order and it needs to be drop shipped from a vendor.
Sales Order
Create the Sales Order as you normally would and make sure to check the box for drop shipment. This check box isn't showing out of the box so you'll have to personalize your page. TIP: use Profile (role) to personalize so it affects all users within that role and then each user won't have to personalize their own page.
Once your Sales Order is created you'll move onto creating a Purchase Order.

Purchase Order
Start a new Purchase Order and enter in the Vendor Name first. After the Vendor Name is entered move to the Shipping and Payment section and select Ship-To = Customer address and then Customer = Customer matches Sales Order. Your Purchase Order should look like the following at this point:

Now you're ready to add the lines from the Sales Order to the Purchase Order. Follow the steps below:
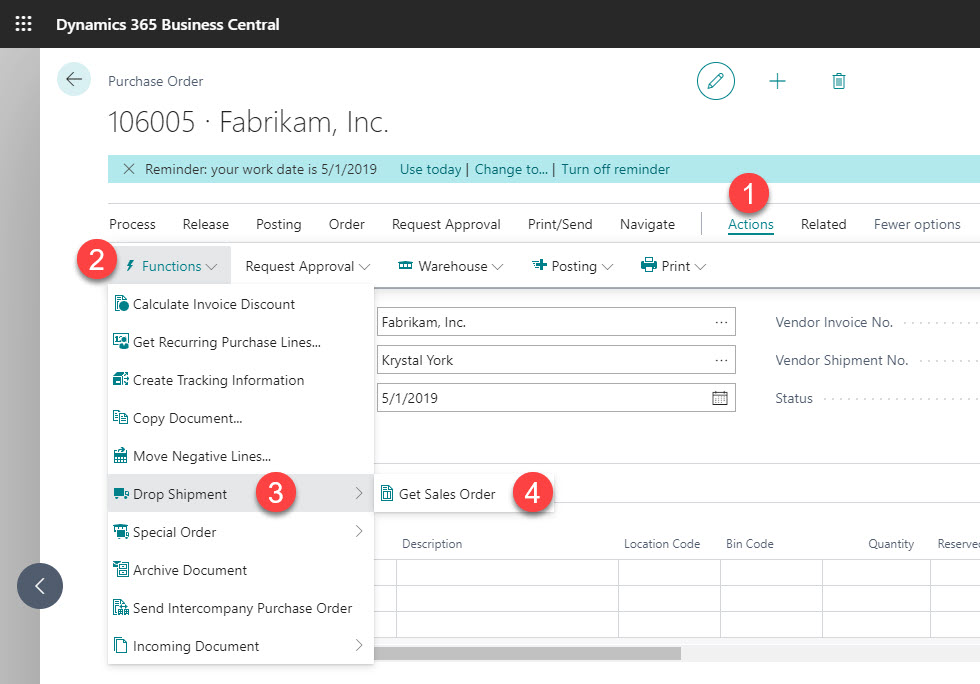
- Actions > Functions > Drop Shipment > Get Sales Order
- Select the correct Sales Order from the Sales List - Order window.

- Review the lines on the Purchase Order and remove any lines that may need to go on another Purchase Order for another vendor. In my example I am going to remove the last line in the screen shot below and create another Purchase Order to a different vendor, so I can show you some invoicing things later on.

- Purchase Order is now created and you can send it to the vendor. Printed Purchase Order shows shipping address as the customer on the Sales Order.


Processing shipments
Once the vendor emails you an invoice or confirms shipment has been completed you would start within the Sales Order.
- Open Sales Order
- Review items on the Sales Order with what the vendor shows as being shipped. Now remember I created two Purchase Orders for two different vendors for my drop shipment.
- Verify the Qty. to Ship field is correct for the quantity that was shipped by the vendor. In my case I'm going to blank out the last line since that was for another vendor than the one that I have the invoice or shipping notice from. I've also added the shipping information into the Shipping and Billing section, highlighted below.

- Now you're ready to post the shipment. Click on Posting > Post and make sure that Ship is selected. This will mark the lines as shipped. TIP: if you're shipping your full Sales Order at this time you could mark Ship and Invoice and then your customer will receive the invoice at this time. In my example I am only shipping 2/3 of the Sales Order so I am going to only Ship. You may also have delegation of duties and someone ships and another invoices, so make sure you know what your company policies are.
 You'll notice now on the Lines that the Quantity Shipped is now populated for the first two lines and the last is showing Qty. to Ship yet. Once I get the invoice from the other vendor showing that item shipped then I'll process that line as Shipped just as I did in the last step. It's important to understand that at this point I've only marked the two lines as shipped and not invoiced the customer yet, as I'm waiting for the last item to ship before invoicing. This is my company policy and yours may be different.
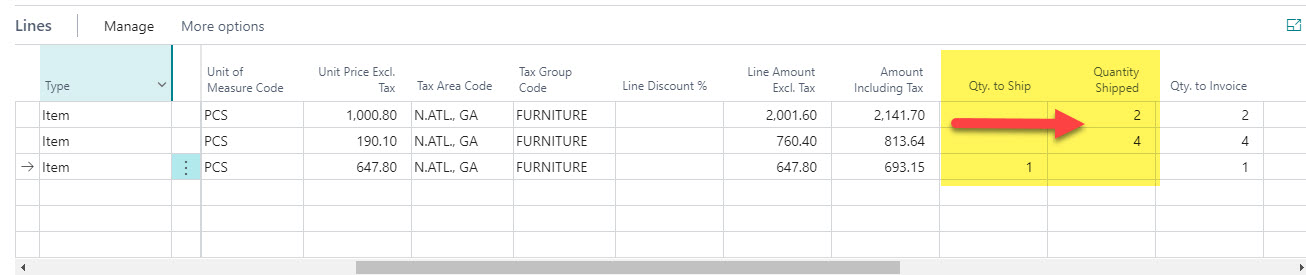


Vendor invoice entry
Once the Sales Order has been shipped and invoiced it's then you can enter the vendor invoice against the Purchase Order. Remember I didn't invoice in the previous step.
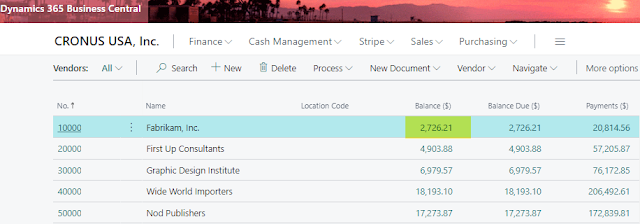
For example my Sales Order has two Purchase Orders each for a unique vendor. At this point I've only marked 2/3 of the lines as shipped. If I go into the Purchase Order and try to post the invoice I'll get the message below. To get around this you'd want to mark the 2/3 lines as shipped and invoiced and then you can enter the vendors invoice against those items. Depending on your processes you may not want to "invoice" the customer for only 2/3 lines and you may want to wait until the last item is shipped and in that case you'll have to wait to post the vendor invoice for the first few items until the Sales Order is fully invoiced.

Written by: Kristen Hosman, Microsoft MVP


Comments
I just saw this blogpost about drop shipments.
I noticed you did a manual job to create the purchase orders and removes lines that should be on a purchase order for another vendor. If you have many items of different vendors you will have a lot of manual work.
I can suggest a better standard approach. You should use the 'requisition worksheet' page.
In the menu you'll find an action Drop Shipment > Get Sales Orders.
This will get all drop shipments that are not yet processed in the worksheet.
You can then use the 'Carry out action message...' button and this will create all the different purchase orders for you.
Best Regards,
Frederik