Posts

Showing posts with the label Admin

User Email View Policies in Dynamics 365 Business Central

Image
If you review the Sent Emails and only see your emails, it's because the User Email View Policies is set to view own emails. Let's review the process of updating this.  Search for  User Email View Policies  and if you don't see it then you'll have to have your Business Central admin update for you or have your admin give you permissions to this page. Within the User Email View Policies page, the User ID '-' is the current user logged into the system.  You have four options to choose from: View own emails View all emails View if access to all related records View if access to any related records You can also add a New line for another user if you want to set up permissions by user. In the example below I'm going to set the current logged in user to view all emails. Now when I go to Sent Emails the user can see everything for all users. ------ Kristen Hosman is a Microsoft MVP in Denver. She works with Dynamics 365 Business Central and related technologies. ...

Remittance Advice modification in Dynamics 365 Business Central

Image
Sometimes I blog just so I don't forget something I learned, so this is one of those times. Special mention Brad Prendergast for his help on this one.  The Remittance Advice , Report ID 10083 has the full bank transit and bank account number shown. I wanted to figure out how to only show the last four digits of each since this report layout is emailed out when you do electronic payments.  Here's the solution: Create a custom layout for report 10083. Open the layout in Microsoft Report Builder. Right click on the field that you'd like to update and select Expression.  Update the text with the following: = "***"+Right( Cstr(Choose(4,Split(Cstr(ReportItems!values.Value),Chr(177)))) ,4) Save the layout and import into Custom Layouts within BC.  Select the custom layout as the default report in the Report Layout Selections page.    ------ Kristen Hosman is a Microsoft MVP in Denver. She works with Dynamics 365 Business Central and related technologies. You ...

RDLC how to make fields UPPERCASE in Dynamics 365 Business Central

Image
Client's bank had a requirement to have the text on the check in all uppercase letters (CAPS). Here's how I accomplished this requirement.  Within Microsoft Report Builder I opened the report. I then right clicked on the field and selected Expression. From there I added the following:  = UCase( Cstr(Choose(101,Split(Cstr(ReportItems!FooterInfo.Value), Chr(177)))) )   ------ Kristen Hosman is a Microsoft MVP in Denver. She works with Dynamics 365 Business Central and related technologies. You can also connect with her through this link:  Kristen Hosman | Linktree

Deleting companies in Dynamics 365 Business Central v 24.3

Image
Version: US Business Central 24.3 Before moving forward with deleting the company make sure you are 100% certain that you want it deleted. There is no going back other than restoring your environment from a backup. Navigate to the Companies page Select the company you'd like to delete Select Delete on the menu and proceed through the prompts   ------ Kristen Hosman is a Microsoft MVP in Denver. She works with Dynamics 365 Business Central and related technologies. You can also connect with her through this link:  Kristen Hosman | Linktree

Environment Transfers Dynamics 365 Business Central

Image
Scenario Client was live on Business Central and wanted one specific company moved from one tenant to another. One issue with the Environment Transfers process is that it moves the entire environment from one tenant to another; in other words, you can't select one specific company within an environment to move. Solution After thinking about how I could accomplish this it came to me, copy the Production environment to a Sandbox environment and then complete the Environment Transfer for the new Sandbox environment. Once the new environment is Active then I would copy the Sandbox environment to a Production environment. From there once the Production environment is Active, I would log in and delete the companies that are not needed in this new tenant.  It's important to take installed Extensions into account as well. For example, this client was using Expense Management by Continia. I reached out to Continia's support and they were able to provide a checklist of actions that n...

Invited External Accountant in Dynamics 365 Business Central now what?

Image
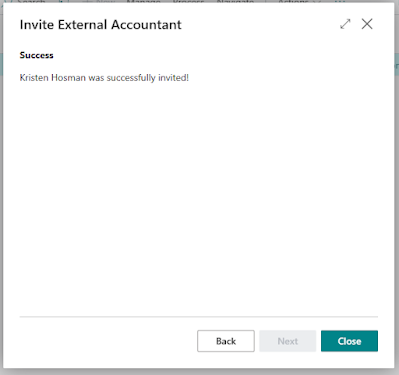
This blog describes what comes next after you invite an External Accountant. If you need to invite an External Accountant than visit this blog:  Invite External Accountant in Dynamics 365 Business Central (kristenhosman.com) You've invited an External Accountant now what? What happens after you've successfully invited an External Accountant? You receive the below message in Dynamics 365 Business Central and your external accountant receives an email.  Steps your External Accountant should take Have your external accountant look for an email with a subject line: You have been invited to Microsoft Dynamics 365 Business Central. The external accountant should click on the link provided in the email. They will be redirected to a Microsoft sign in window. In my case the external accountant email isn't listed so I'm going to select use another account. Enter email. Next window suggests that a code was sent to email. Go pull code from email and enter into next window. Accept t...

Invite External Accountant in Dynamics 365 Business Central

Image
External Accountant License External Accountant licenses are for the sole purpose of providing supplemental professional accounting or bookkeeping services related to the auditing process. Once you've invited your external accountant now what? Check out my next blog on this topic.  Invited External Accountant in Dynamics 365 Business Central now what? (kristenhosman.com) Within Dynamics 365 Business Central follow these instructions to invite an external accountant. Navigate to the Users page. Select Process > Invite external accountant. Follow these instructions to invite an external accountant. Verify License is Available The easiest way to do this is to go to the Microsoft 365 admin center and navigate to the Billing > Licenses section. Within the Subscription section you should see Dynamics 365 Business Central External Accountant. Email - Invite External Accountant Scenario If you get the following message after clicking on Invite External Accountant, then follow these s...

Microsoft Dynamics 365 Business Central: adding new licensed users to BC

Image
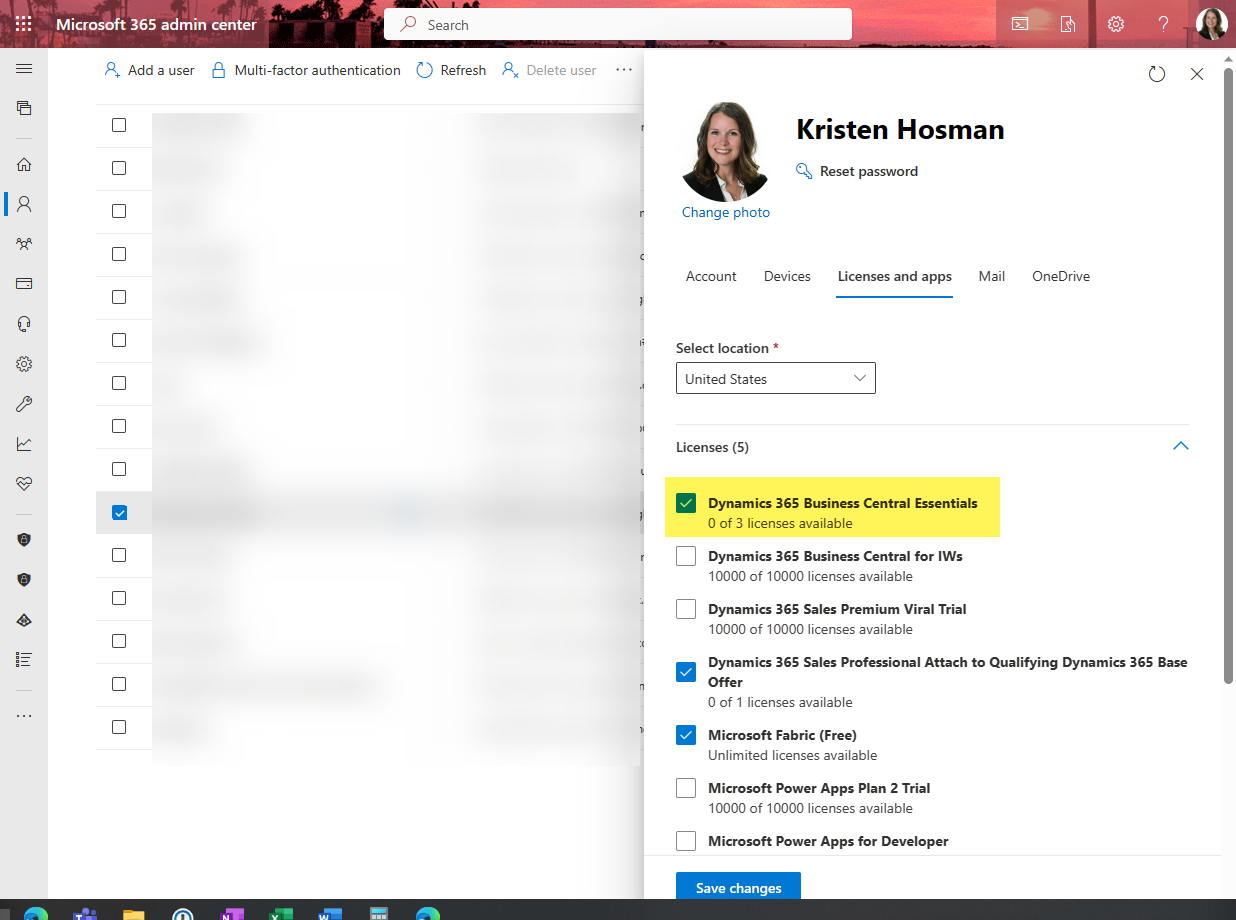
Adding a new licensed user isn't hard to do within Business Central (BC).  Prerequisite: license is purchased and available to assign to user. You also must be an Internal Admin or have proper security within BC to complete these tasks.  Microsoft 365 admin center Assign BC license to user. Dynamics 365 Business Central Navigate to Users page. Select Process > Update users from Microsoft 365 Update users from Microsoft 365 > Next Update users from Microsoft 365 > Next Update users from Microsoft 365. Review the updates within this window and click finish. Lastly assign user group or permission sets and assign company access.  Version: US Business Central 22.1 (Platform 22.0.58213.0 + Application 22.1.55890.56216) Written by: Kristen Hosman, Microsoft MVP