Posts

Showing posts with the label Purchasing

Over-Receipt Code for Purchase Orders

Image
Client: We are unable to process invoices that go over the PO amount. Is there a way to have the system accept up to 5% over the amount of the purchase order? We are currently reopening and changing the purchase orders at each instance. 1. Create Over Receipt Code: Use the Tell Me search feature by pressing ALT+Q, then type "Over receipt" and select "Over-Receipt Codes" from the list. This will bring up the page where you can manage over receipt settings. 2. Create Over Receipt Code: On the Over-Receipt Codes page, you can create new codes that define the percentage tolerance for over-receiving. For example, create one code for a 5%. The code will specify how much more than the ordered quantity can be received. Optional Approval Workflow: If you want to require approval for over-receiving, you can check the "Approval required" checkbox on the Over Receipt Codes page. This will enforce a workflow where excessive receipts must be approved before they can be...

Received not invoiced report in Dynamics 365 Business Central

Image
If you're using Purchase Orders (PO) in Business Central and have a receiving process that requires a warehouse team to receive items off a PO then this tip is for you. Within the Purchase Orders list you can personalize to add the column Amount Received Not Invoiced. This will all Accounts Payable and the Purchasing team to know what PO's have been received but not invoiced yet. To learn how to personalize Business Central check out this blog:  Personalizing Screens In Dynamics 365 Business Central (kristenhosman.com) Reconcile AP to GL There is also a report in Business Central called Reconcile AP to GL that can be useful. The name doesn't make sense but the data it provides does.  Search for  Reconcile AP to GL and make sure to bookmark it since it's hard to remember. Filter if needed or just select Print or Preview. Review the two pages. “The AP to GL Reconcile report is a 'point in time' report. It cannot be run for prior days as it gets its data from the ...

Vendor Payment Discounts and Payment Terms in Microsoft Dynamics 365 Business Central

Image
Scenario: you have a vendor that offers a 2% discount on the net amount if they pay the invoice in full within the first ten (10) days of the invoice date. Otherwise, the full invoice amount is due in 30 days without the discount.  System Configuration Within Business Central you will want to set up a new Payment Terms Code for this specific payment term.  Search for Payment Terms Click New to add a new line Update to reflect the information below Once the Payment Term is set up you can assign this to a specific vendor by opening up the Vendor Card and assigning. Open Vendor Card Add Payment Terms Code to the Payments section of the Vendor Card Verify that the Vendor Posting Group has the correct G/L Account listed for the Payment Discounts.  Open the Vendor Posting Groups Review or update the Payment Disc. Debit Acc. and Payment Disc. Credit Acc. fields with the correct Payment Discounts G/L Account. In my system account 68290 is set up for Purchase Discounts.  Proc...

Entering a Non-PO Purchase Invoice in Dynamics 365 Business Central

Image
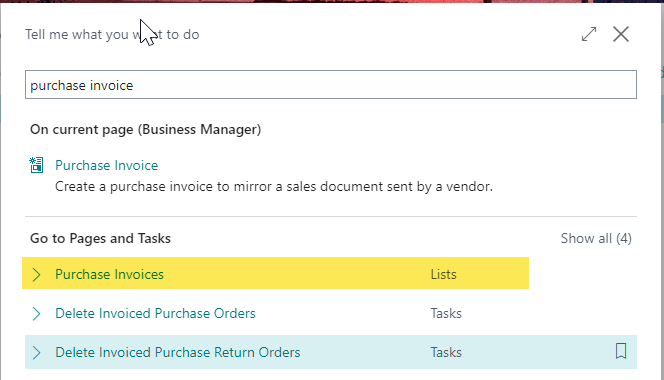
Many businesses using Microsoft Dynamics 365 Business Central don't utilize the Purchase Order functionality and therefore when they receive a vendor invoice, they need to enter that into Business Central through a Purchase Invoice transaction. This is the most basic example below. If you have other needs talk with your Partner or Business Central consultant for advice.  Purchase Invoice There are several ways to enter a Purchase Invoice but for this example I'll navigate to the Purchase Invoices list. When in the Purchase Invoices window click +New to start a new Purchase Invoice. Populate the following in the General Fast Tab: Vendor Name: select vendor from your vendor list Document Date: invoice date Posting Date: date that the transaction will post to the G/L Vendor Invoice No.: invoice number              At minimum p opulate the following in the Lines section: Type: G/L Account in this example. You can also choose item for example if you ne...

How I use the new GL Account Review functionality in Dynamics 365 Business Central

Image
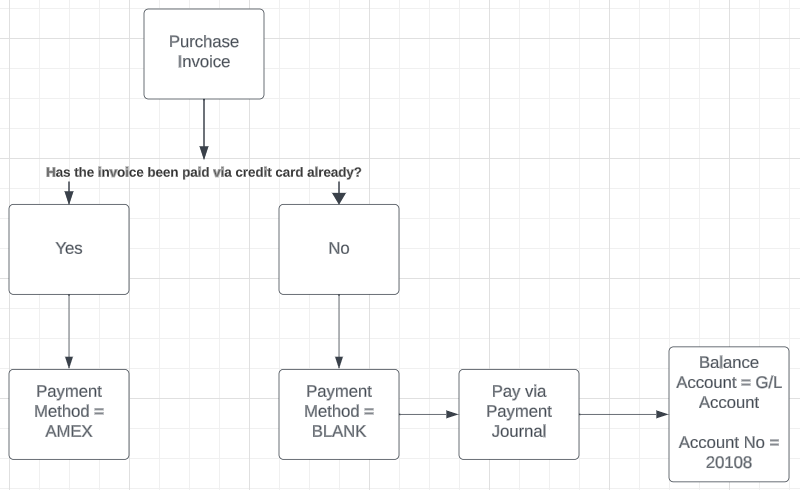
The purpose of this blog is to discuss how I use the Review Entries feature in Microsoft Dynamics 365 Business Central to reconcile my business credit card. This feature is great for reconciling balance sheet accounts because you can match debits and credits together to track what the remaining account balance is made up of.  Process and Setup As vendor invoices are received and entered into Business Central, I follow the workflow below. I will go through two scenarios in this blog.  Invoice is received and already paid via credit card. Invoice is received and will be paid via credit card at a later date. Let's take a moment to review my setup in the system. In order for this to work as expected I set up a payment method named AMEX and add a balance G/L account of 20108.   Account 20108 is my liability account for AMEX Payable.  Make sure the Review Policy is set to 'Allow Review and match Balance' on the G/L Account Card. Examples of entering vendor invoices No...

Setting up Sales and Use Tax in Microsoft Dynamics 365 Business Central

Image
What is a tax jurisdiction and tax area? There are two major steps to setting up sales and use tax in Business Central. The first is tax jurisdictions and the second is tax areas. A tax jurisdiction is a city, county, state, or other special tax that requires taxes within its limits. A tax area is a physical area, and each area can be assessed taxes by different jurisdictions.  Tax Jurisdictions You're going to want to setup a new jurisdiction per city, county, state, or other special tax. I'm going to use zip code 80470 for an example. I pulled the following information from online and it shows that for zip code 80470 there are four jurisdictions totaling 4.5% sales tax.  Source:  80470 Sales Tax Rate (2022) - Avalara Setting up Tax Jurisdictions in Business Central Search for tax jurisdictions Click on +New Complete the information in the new row. In this case I left Default Sales and Use Tax percentage as 0 since I have several tax groups codes setup. Select the line a...