Recurring purchase lines in Dynamics 365 Business Central allows users to setup standard purchase codes that can then be assigned to specific vendors. Once assigned to a vendor the user can quickly process a purchasing transaction (purchase quote, order, invoice, or credit memo) by inserting the recurring purchase lines onto the document. The process is similar to recurring sales lines.
Outlined below are the steps to setup a standard purchase code and assign it to a vendor along with processing a purchase invoice.
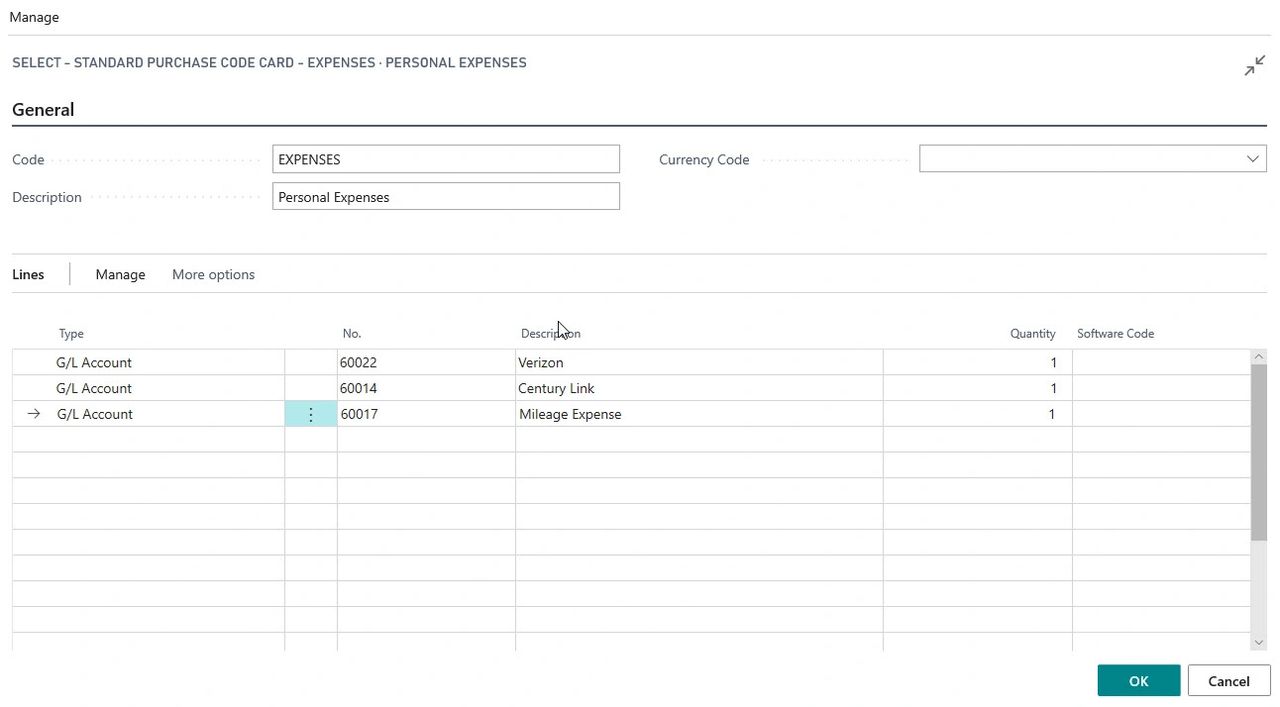
1. Lookup recurring purchase lines then select new. In the example below, a code ' Expenses' has been setup for those monthly personal expenses that get reimbursed to employees. You can also setup different types for a comment, G/L account, item, resource, fixed asset, or charge (item).
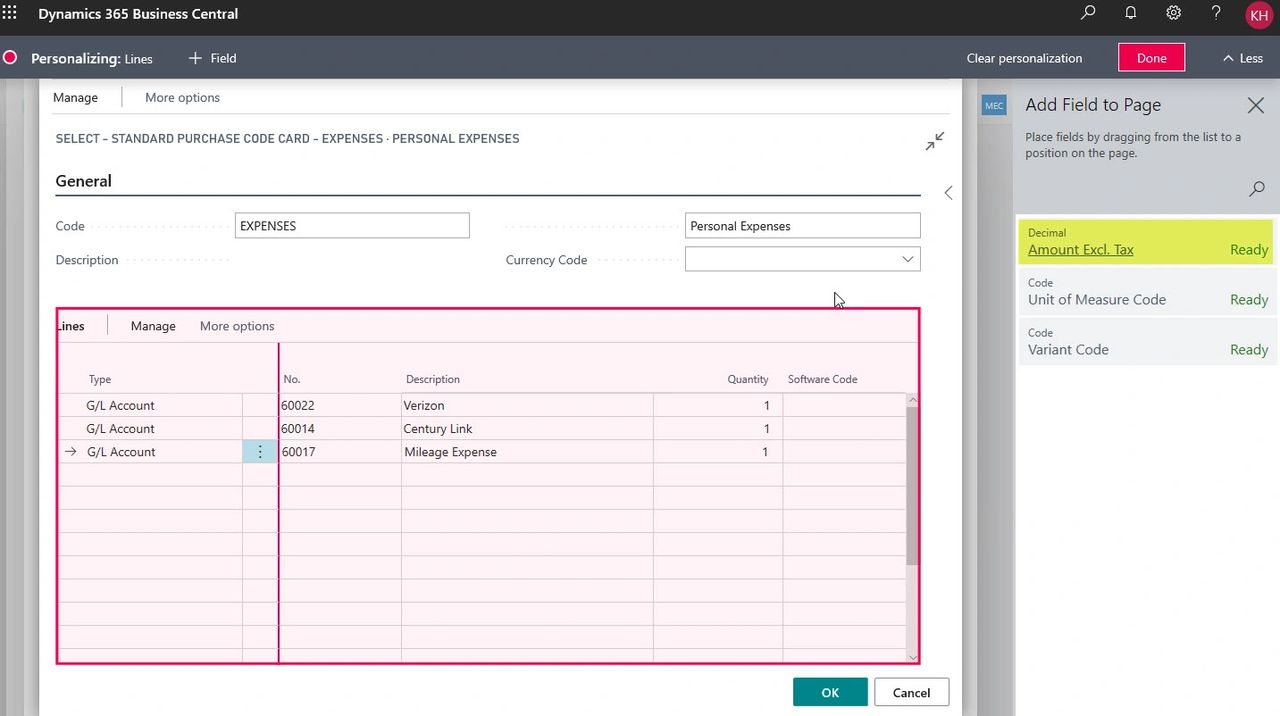
Unfortunately the amount field isn't included in this window out of the box so you'll need to add that if it's something you'd like. To do this simply click on the settings then personalize. Once the personalizing window is open select '+ Field' and then select 'Amount Excl. Tax' and drag to the area you'd like this to show within the window.
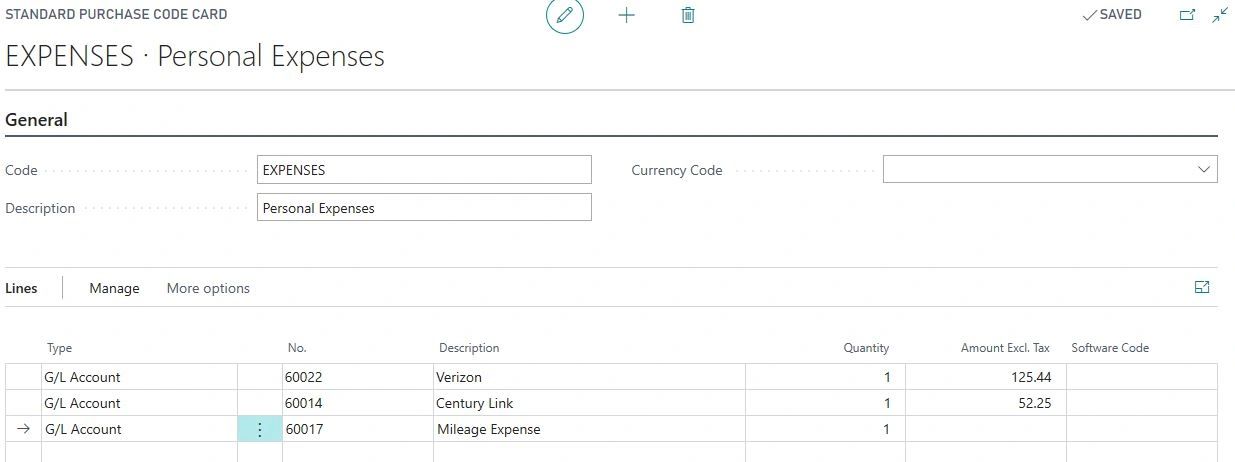
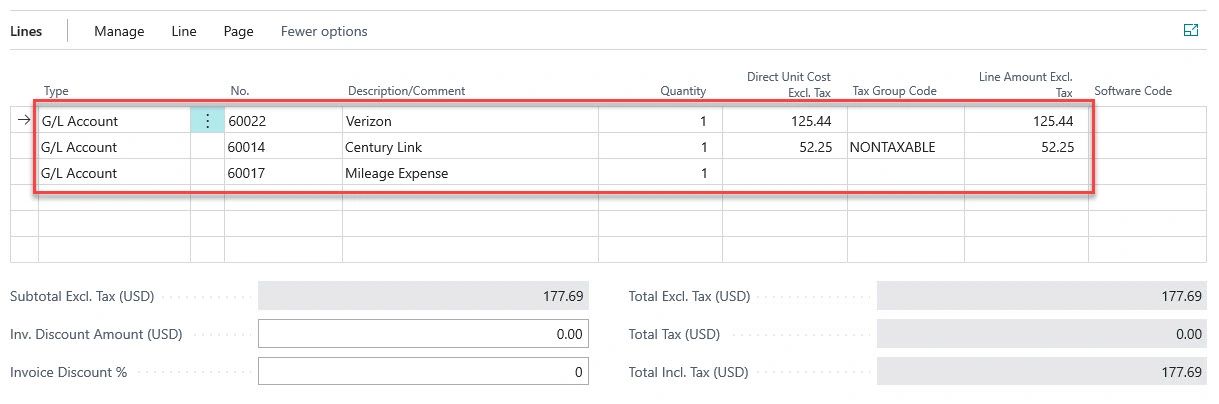
Below is the completed standard purchase code card for expenses. The amounts of two of the three lines have been added which will pull through on the purchase invoice shown later on.
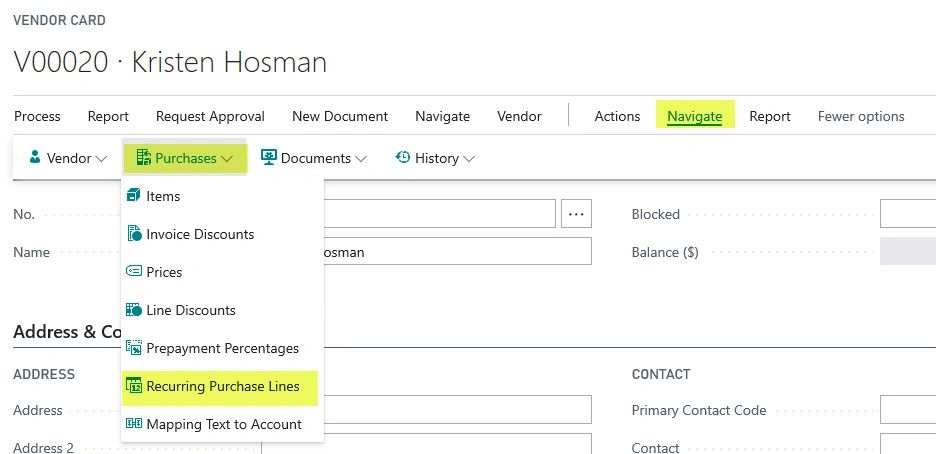
2. To assign the purchase code to the vendor open up the vendor card then click on the following Navigate > Purchases > Recurring Purchase Lines.
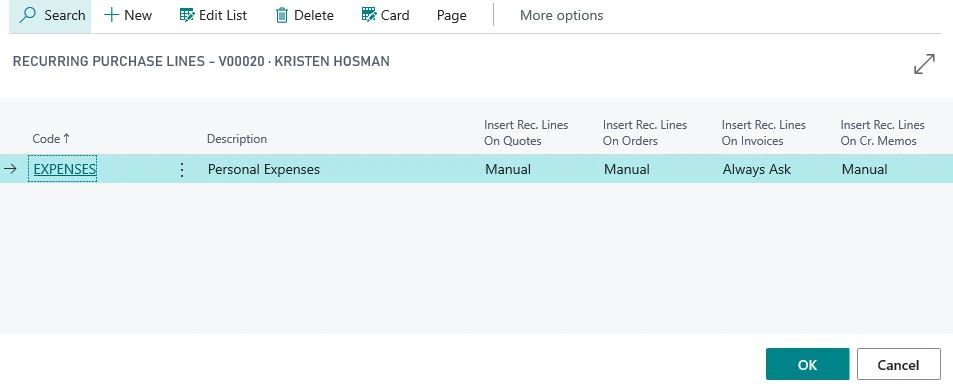
Within the recurring purchase lines window for the vendor you can assign the purchase code to the vendor and configure how you'd like the system to manage the purchase lines. There are three options for how you'd like the lines inserted onto a document: manual, automatic, or always ask. In the example below I've told the system to always ask the user if they'd like the recurring purchase lines added to the purchase invoice.
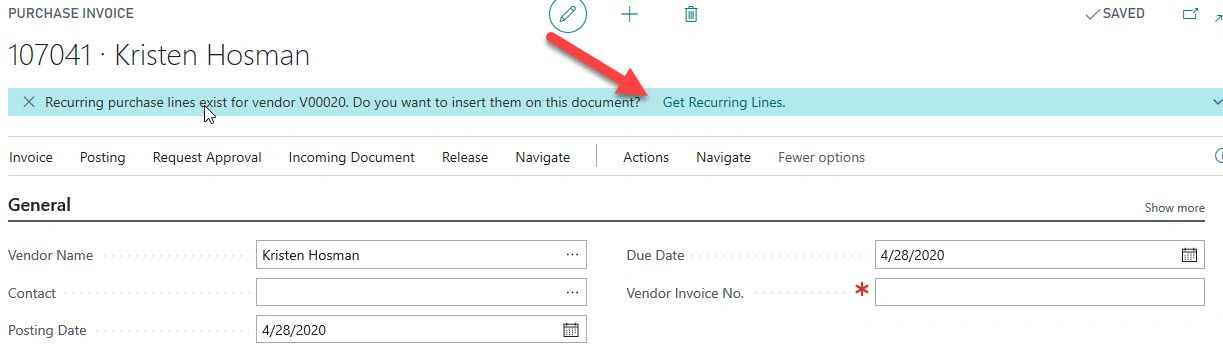
3. The result of the creating a standard purchase code card and assigning recurring purchase lines to the vendor is below. When a user creates a purchase invoice for the vendor that the purchase code was assigned to, there will be a notification at the top of the page asking the user if they like to insert the recurring purchase lines onto the document. Select "get recurring lines" and the recurring purchase lines window opens up where you can select the code you'd like to use.
Once the recurring purchase lines code is selected, the lines section of the purchase invoice section will be populated. Verify or update the information and post the document.
Get link
Facebook
X
Pinterest
Email
Other Apps
Comments
Anonymous said…
How would I know which vendors have recurring purchase lines created?
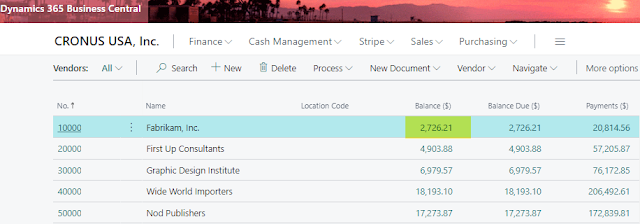
Applying posted credit memos to posted invoices isn't a hard task to complete in Microsoft Dynamics 365 Business Central. The example I use below is for a vendor credit, but the same process applies to customers. Version: US Business Central 20.0 Open up the vendors list. Search for vendor that you'd like to apply the credit memo to an invoice for. Click on Balance field to open up Vendor Ledger Entries window. This will show all the 'open' documents on the vendor ledger. Select the line for the Credit Memo that you want to apply to a posted invoice. Click Process > Apply Entries Within the Edit - Apply Vendor Entries window select the line(s) that you'd like the credit memo applied to. Click Process > Set Applies-to ID This will put the users name into the Applies-to ID field on the line selected. To post the application select Process > Post Application. Written by: Kristen Hosman, Microsoft MVP
Steps to reverse a bank account transaction or customer payment in this case. Have you ever entered a customer payment and needed to void it out of the system? If so, this blog is for you! Follow the steps below to learn how to unapply a payment and void/reverse the payment. These steps will void the payment and the invoice will remaining outstanding when completed. Open the Bank Account Ledger Entries window and select the line for the transaction in question. ctrl+alt+Q on keyboard to open the Find entries page, or click on find entries on the Action Bar. Click on the Detailed Cust. Ledg. Entry line Select a line that has 'Application' as the Entry Type and then Unapply Entries on the Action Bar Click Unapply Yes OK Close windows until you get back to the Bank Account Ledger Entries page. Select transaction and then Reverse Transaction from the Action Bar. Reverse Yes OK Written by: Kristen Hosman, Microsoft MVP
If you're using Purchase Orders (PO) in Business Central and have a receiving process that requires a warehouse team to receive items off a PO then this tip is for you. Within the Purchase Orders list you can personalize to add the column Amount Received Not Invoiced. This will all Accounts Payable and the Purchasing team to know what PO's have been received but not invoiced yet. To learn how to personalize Business Central check out this blog: Personalizing Screens In Dynamics 365 Business Central (kristenhosman.com) Reconcile AP to GL There is also a report in Business Central called Reconcile AP to GL that can be useful. The name doesn't make sense but the data it provides does. Search for Reconcile AP to GL and make sure to bookmark it since it's hard to remember. Filter if needed or just select Print or Preview. Review the two pages. “The AP to GL Reconcile report is a 'point in time' report. It cannot be run for prior days as it gets its data from the ...


Comments