Bank account linking in Microsoft Dynamics 365 Business Central
Microsoft Dynamics 365 Business Central allows you to import electronically your bank statements from your bank so you can quickly fill in the Payment Reconciliation Journal page and bank account reconciliations.
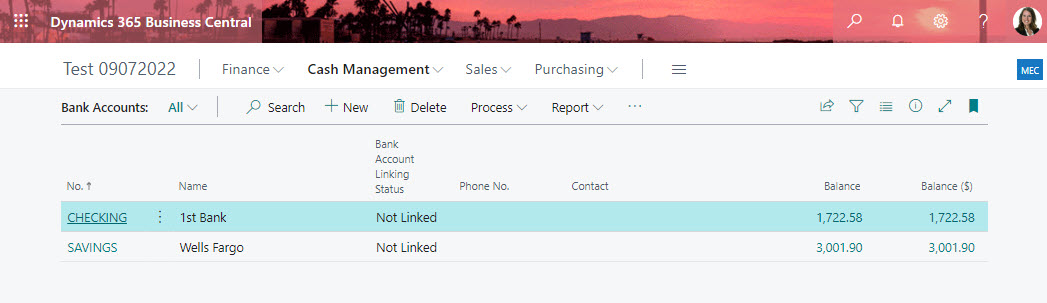
- Navigate to Bank Accounts window.
- Select bank account and then click on Bank Statement Service > Link to Online Bank Account

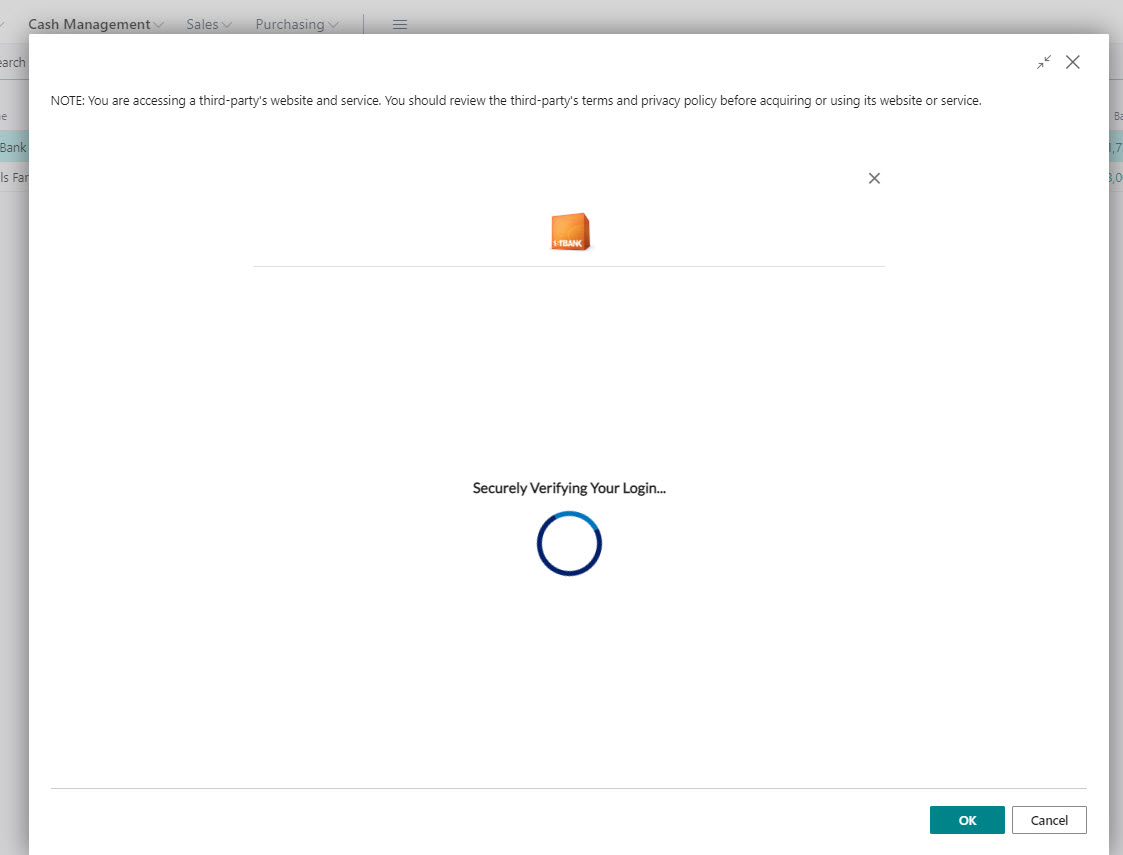
- You will be prompt to enable Envestnoet Yodlee Bank Feeds Service if you've never enabled it before.

- Review the terms and conditions and accept.

- Review and Accept the Envestnet Yodlee Bank Feeds - Terms of use. Click Close once you've accepted the terms of use (toggle).

- Search for bank and select the one with the correct URL for your bank.

- Enter in your information that you use when you log into your banks website. Click Submit.


- Once connected to your bank you will see a list of your accounts that will be included to being linked in Business Central. You can uncheck any accounts you don't want linked as well.
Click Save & Finish or OK at the bottom of the window. In v20.4 the Save & Finish button doesn't work so you have to click OK.
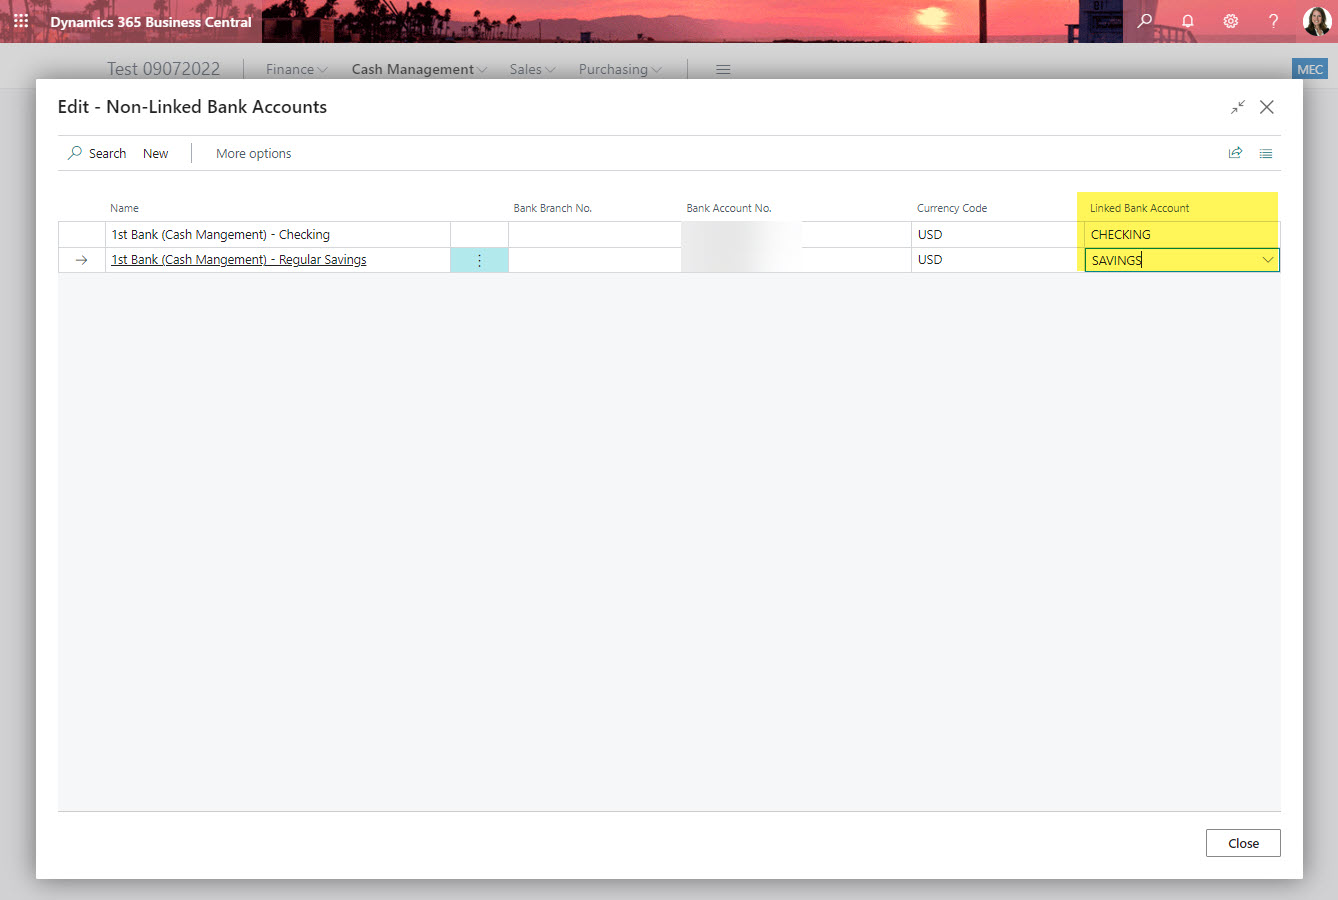
- Update the Linked Bank Account field in the Edit - Non-Linked Bank Accounts window. Once compeleted click Close.
- Bank accounts have been linked.


Written by: Kristen Hosman, Microsoft MVP


Comments