Add field to page: all fields (Preview) Dynamics 365 Business Central v23
Add field to page
Have you ever needed to add a field to a page, and you couldn't without a developer? There was once a time where not all fields in the table were available to be placed on a page without a developer or using the Design tool.
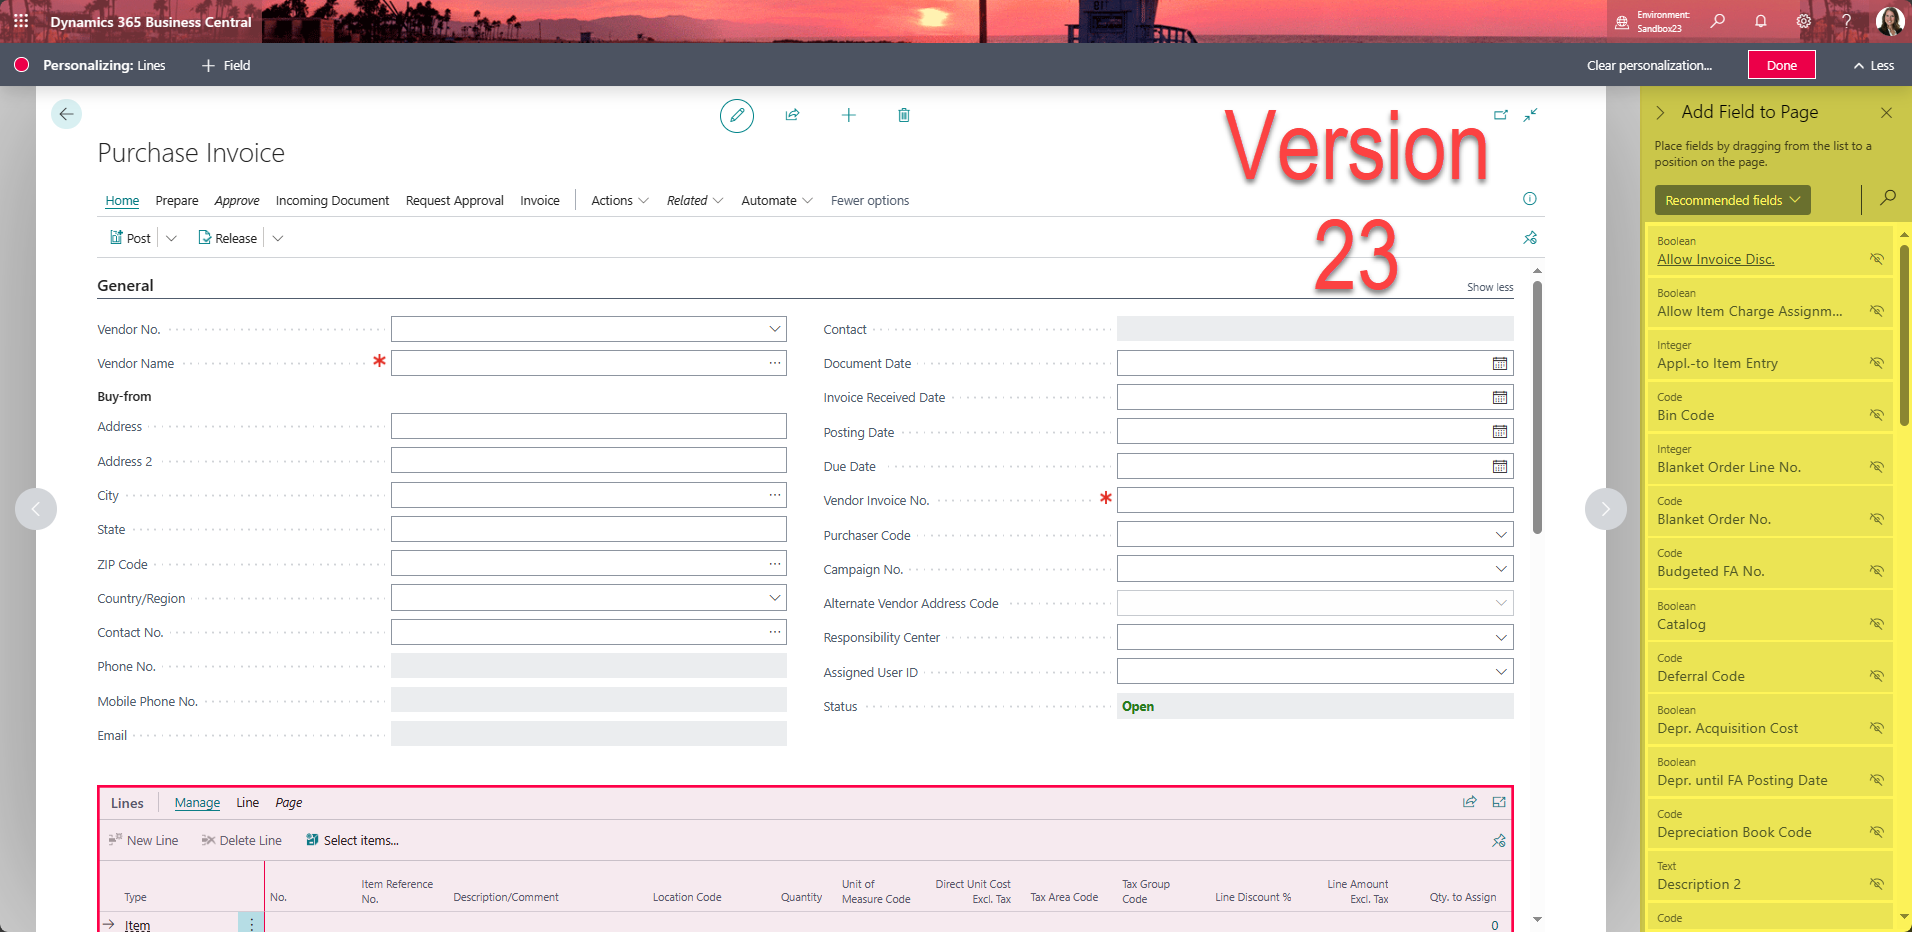
Microsoft has fixed this inconvenience and in version 23 the feature "add existing table fields to optimize your pages" will be in preview. Learn more about this addition to Business Central here: Add existing table fields to optimize your pages | Microsoft Learn
 |
| Version 23 showing the new feature. |
What does this mean?
You can now, without a developer add a field within a table to the page.
How does it work?
It's really simple actually.
- Navigate to the Profiles (Roles) list and choose Customize Pages from the Action Bar.
- When the new browser tab loads, navigate to the page within Business Central that you'd like to add a field to.
- Expand the customization banner and choose + to display the Add Filed to Page pane.
- Select All Fields (Preview) if not already selected.
- Select fields you'd like to add and drag and drop to where you'd like them to be placed.
- Click Done on the Customizing banner.


Comments